If your lawn looks more like a dust bowl or a weed patch than a lush green retreat, you’re not alone. Across Australia, plenty of homeowners find themselves stuck between letting their lawn go completely or shelling out for an expensive turf replacement.
But here’s the good news: lawn renovation is a realistic, budget-friendly third option. It allows you to refresh your existing grass without starting from scratch. The key question, though, is how exactly should you go about it?
Step 1: Work Out If Renovation Is the Right Move
Before doing anything, take a proper look at your lawn.
You should consider renovating your lawn if:
- It has bare or thinning patches
- Weeds keep coming back despite your efforts
- The soil feels hard and compact underfoot
- Water tends to pool or run off rather than soak in
- The grass looks tired even after mowing and feeding
If your lawn is more weeds than grass or the soil is completely shot, you may need to consider a full lawn replacement. But if there’s still some good grass left, renovation is likely the way to go.
Step 2: Choose the Right Time of Year
Timing matters more than you might think. Renovating at the wrong time can waste all your hard work.
In Australia:
- Warm-season grasses (like buffalo, couch and kikuyu) respond best to renovation in spring through early summer. That’s when they’re actively growing and will recover quickly.
- Cool-season grasses (like rye or fescue) are best tackled in early autumn or early spring in cooler climates.
Avoid renovations during extreme heat, deep winter, or during drought conditions unless you have a solid irrigation plan.
Step 3: Clear Out the Junk
You’ll need to get rid of anything standing in the way of new growth. That includes:
- Dead grass (also known as thatch)
- Weeds—preferably using a selective herbicide or hand removal
- Leaves, sticks, and surface debris
- Excess lawn clippings if they’ve built up too much
Give the lawn a really low mow—this is called scalping—to expose the soil and reduce competition for light and space.
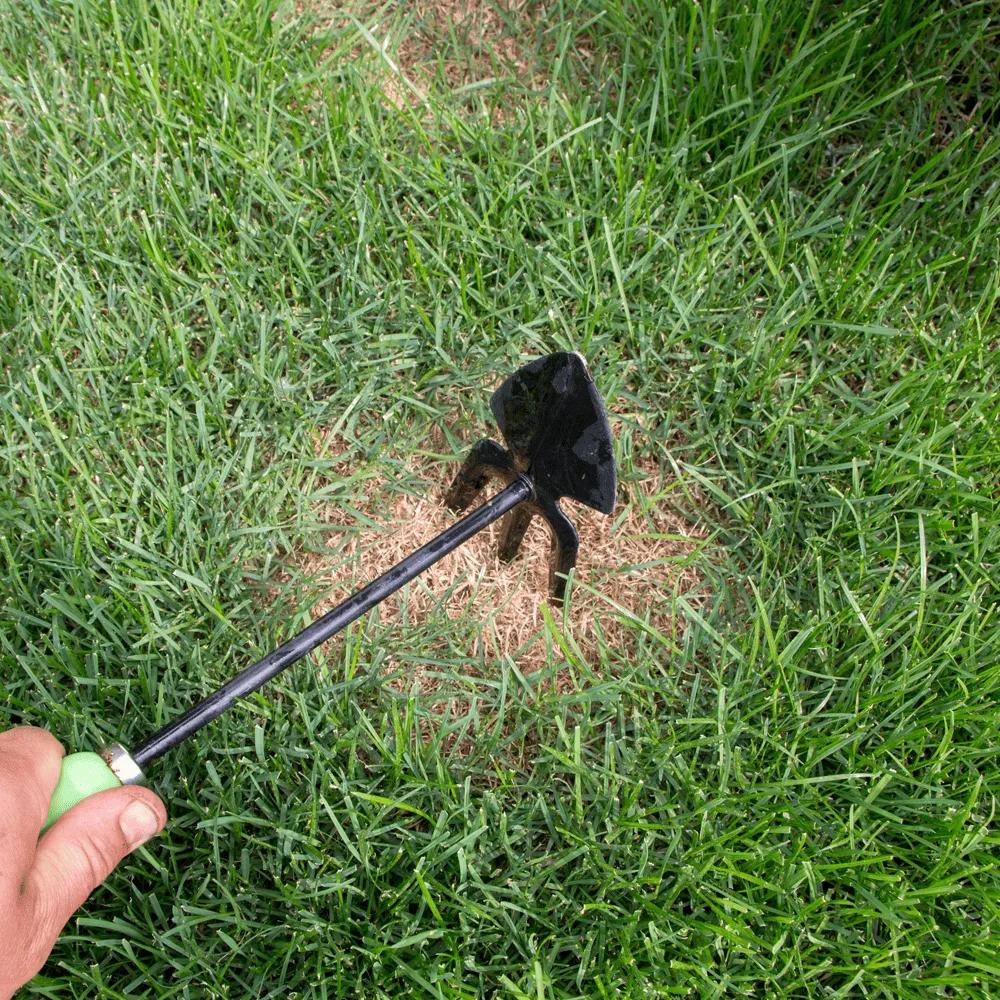
Step 4: Break Up the Soil
A common reason lawns struggle is compacted soil. This happens over time with foot traffic, pets, kids playing, or even just regular mowing. Compaction makes it harder for water, air and nutrients to get down to the roots.
You can relieve soil compaction with:
- Manual coring tools (for smaller areas)
- Powered aerators (for large lawns or heavily compacted ground)
Aim to punch holes around 7–10 cm deep across the entire lawn. These holes allow new roots to grow deeper and improve overall turf health.
Step 5: Feed the Soil (Not Just the Grass)
A lot of homeowners make the mistake of dumping fertiliser on the surface and hoping for the best. Renovation is a great opportunity to improve the soil itself, not just the grass above it.
To do this:
- Apply a thin top dressing of sandy loam, organic compost, or a soil blend suited to your turf type
- Focus on spreading evenly, filling in low spots and covering exposed roots
- Water it in gently to help it settle
You can mix in soil conditioners or slow-release fertilisers at this stage to support long-term root growth.
Step 6: Reseed or Encourage Spread
Once the lawn is prepped, you’ll need to help it fill in the gaps. Depending on your grass type and region, there are two ways to go about it:
- Overseeding – This is ideal for cool-season grasses. Scatter new seed over the area and lightly rake it into the top layer.
- Encouraging spread – For warm-season grasses like couch or kikuyu, you may not need seed. These grasses spread via runners, so clearing space and feeding the lawn is often enough to trigger growth. You can also plug or sprig bare spots if needed.
In both cases, make sure the surface stays consistently moist for the first couple of weeks. Watering lightly once or twice a day is usually enough during germination or early runner spread.
Step 7: Add Fertiliser at the Right Time
Fertilising your lawn too early—or with the wrong product—can do more harm than good. Choose a starter fertiliser that’s high in phosphorus (good for root development) and apply it only once you see signs of new growth.
Once your lawn is properly established, switch to a balanced fertiliser suited to the season. Be cautious with nitrogen-heavy products early on—they can encourage weak, fast growth that burns out in hot weather.
Step 8: Maintain the Momentum

After the initial renovation, it’s tempting to walk away and hope for the best. But the success of your lawn depends on a few weeks of consistent care:
- Keep the lawn slightly damp during the establishment phase
- Avoid mowing until the new growth reaches 5–7 cm in height
- Don’t let the soil dry out completely—this is especially important in the first 3–4 weeks
- If weeds pop up again, spot-treat them early before they spread
Once the new turf takes hold, you can return to regular maintenance, but the early stages are when it really counts.
Final Thoughts
So, how should you renovate your lawn? With a methodical, step-by-step approach that gives your grass what it really needs—air, nutrients, and a chance to regrow. Lawn renovation isn’t a quick fix, but it’s a smart, sustainable alternative to full replacement that saves time and money while delivering long-term results.
Whether you’ve got a tired kikuyu front yard or a struggling couch lawn in the backyard, renovation helps you take control without starting over. With the right prep, good timing, and a bit of patience, you can bring your outdoor space back to life—and keep it that way.